How to Install Hexagon Lights
How to Install Hexagon Lights
Easy DIY Setup Guide for Garage, Gym & Workshop


Installing hexagon LED lights is one of the easiest ways to transform a dark garage, gym, or workspace into a bright, professional-looking environment.
With the right preparation, most DIY installations take just 2 to 4 hours.
HEXLED Lighting has helped thousands of customers set up their hexagon lighting systems over the past 13+ years. This guide covers everything from tools and planning to mounting, wiring, and troubleshooting.
Watch our full installation walkthrough below, then follow the detailed steps in this guide.
Before You Start: Tools, Safety, and Connection Type
Before picking up a drill, take a few minutes to gather your materials and decide how you want to connect your lights.
Tools and Materials Checklist:
Most homeowners already have these tools on hand. If not, a basic drill and level are worth the investment.
Plug-In vs. Hardwire: Which Setup Is Right for You?
Plug-in installation works well if you:
Hardwired installation is better if you:
Either way, all HEXLED hexagon lights feature 3-pin grounded connectors for safe, reliable electrical connections.
Safety Reminders:
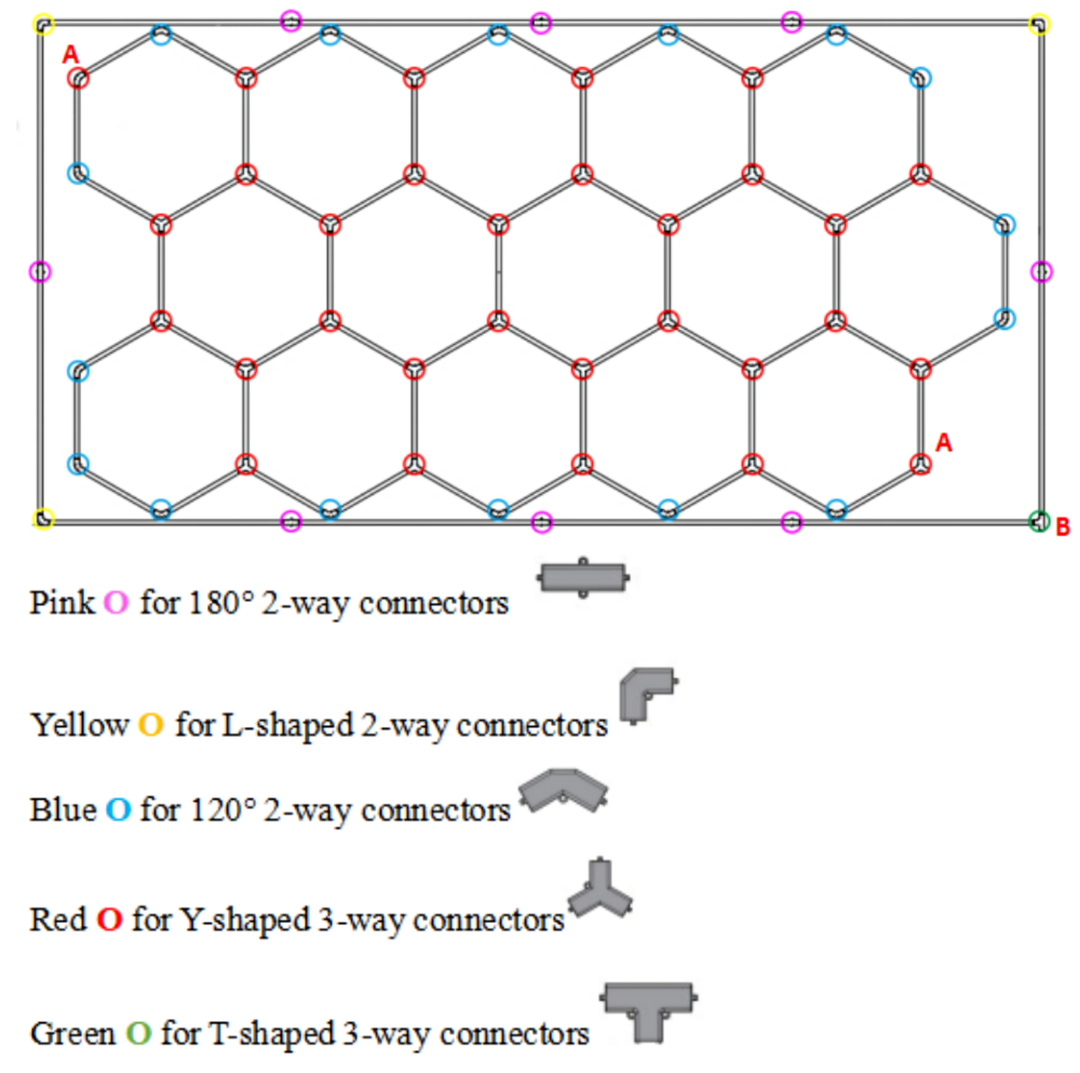
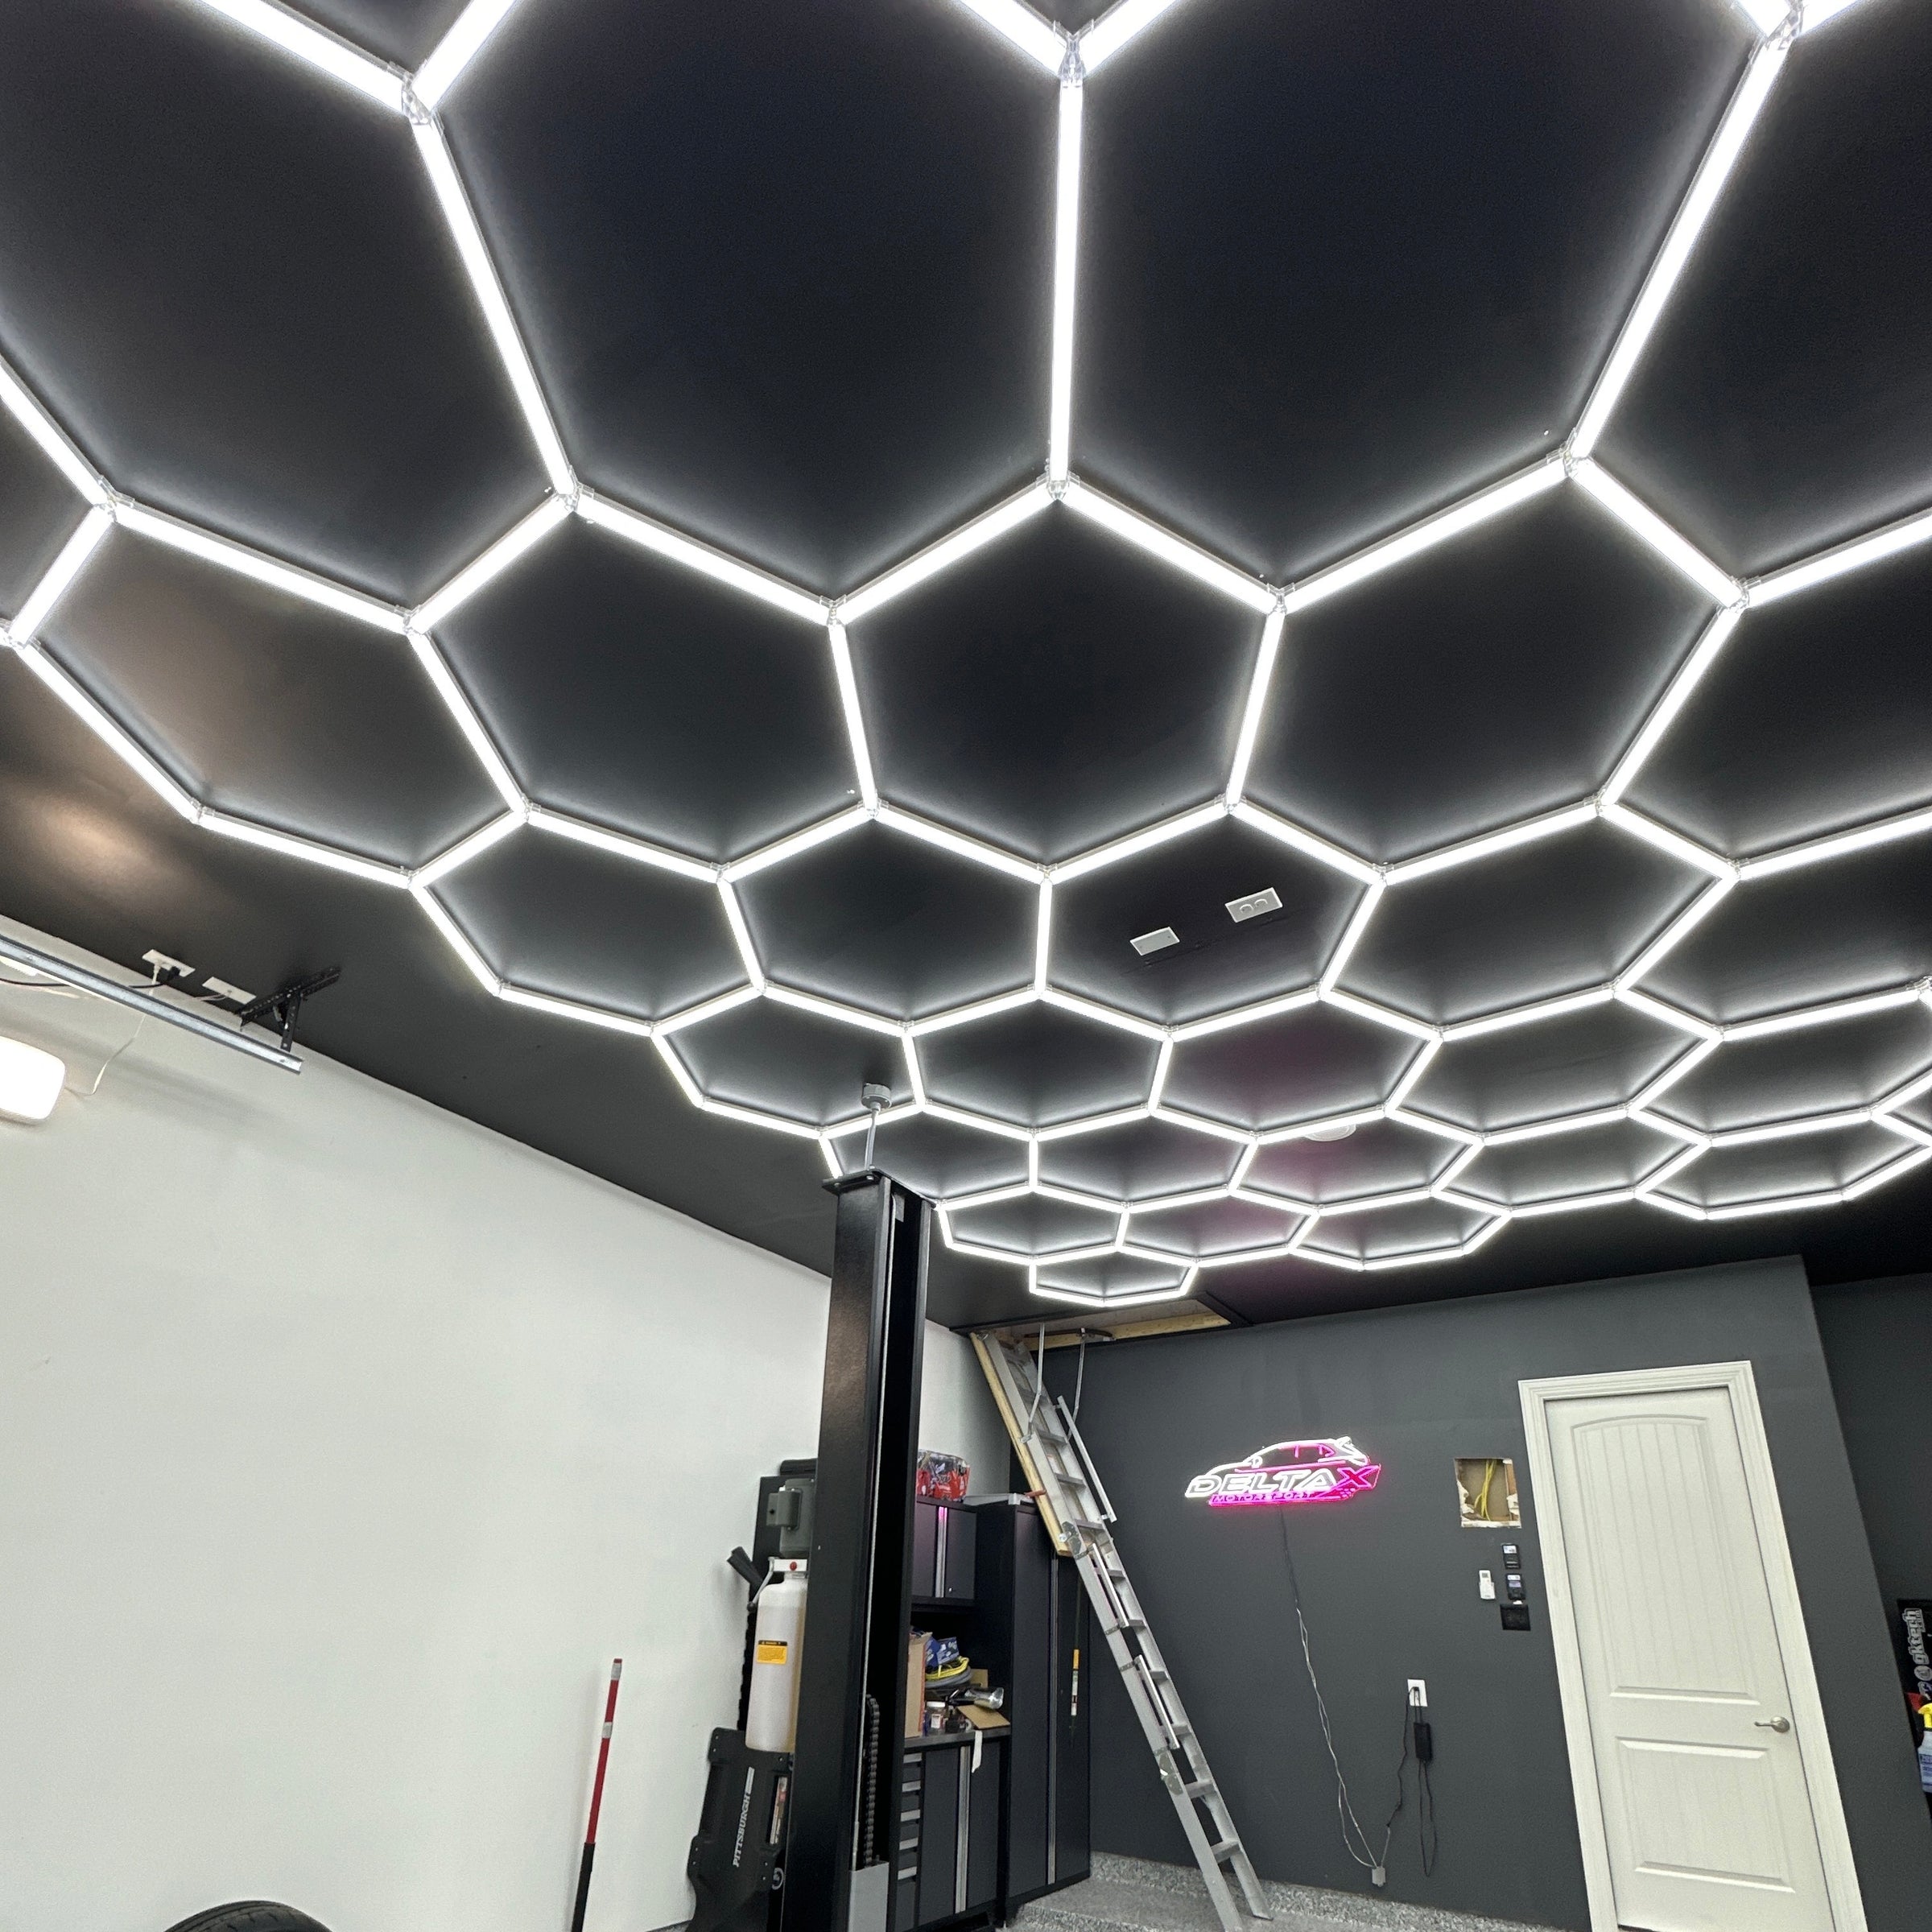
One of the most common questions we get: "Where does the power cable come out?"
The short answer - anywhere along the outer edge.
With HEXLED hexagon lights, the power cable is not locked into a fixed position. Every connector point along the outer edge of your layout is a potential power entry point.

Red circles indicate potential power entry points. You can connect the power cable at any outer connector.
Simply choose the outer connector closest to your power source. This keeps cable runs short and cable management clean.
Planning tip: Before ordering, identify where your closest power source is relative to where the lights will sit on your ceiling.
If you are building a new garage or renovating, ask your electrician to install a junction box directly above the light layout. This gives you the cleanest result with minimal visible cabling.

Lay out all components before you climb the ladder:
Taking 10 minutes to organize now prevents multiple trips up and down the ladder later.

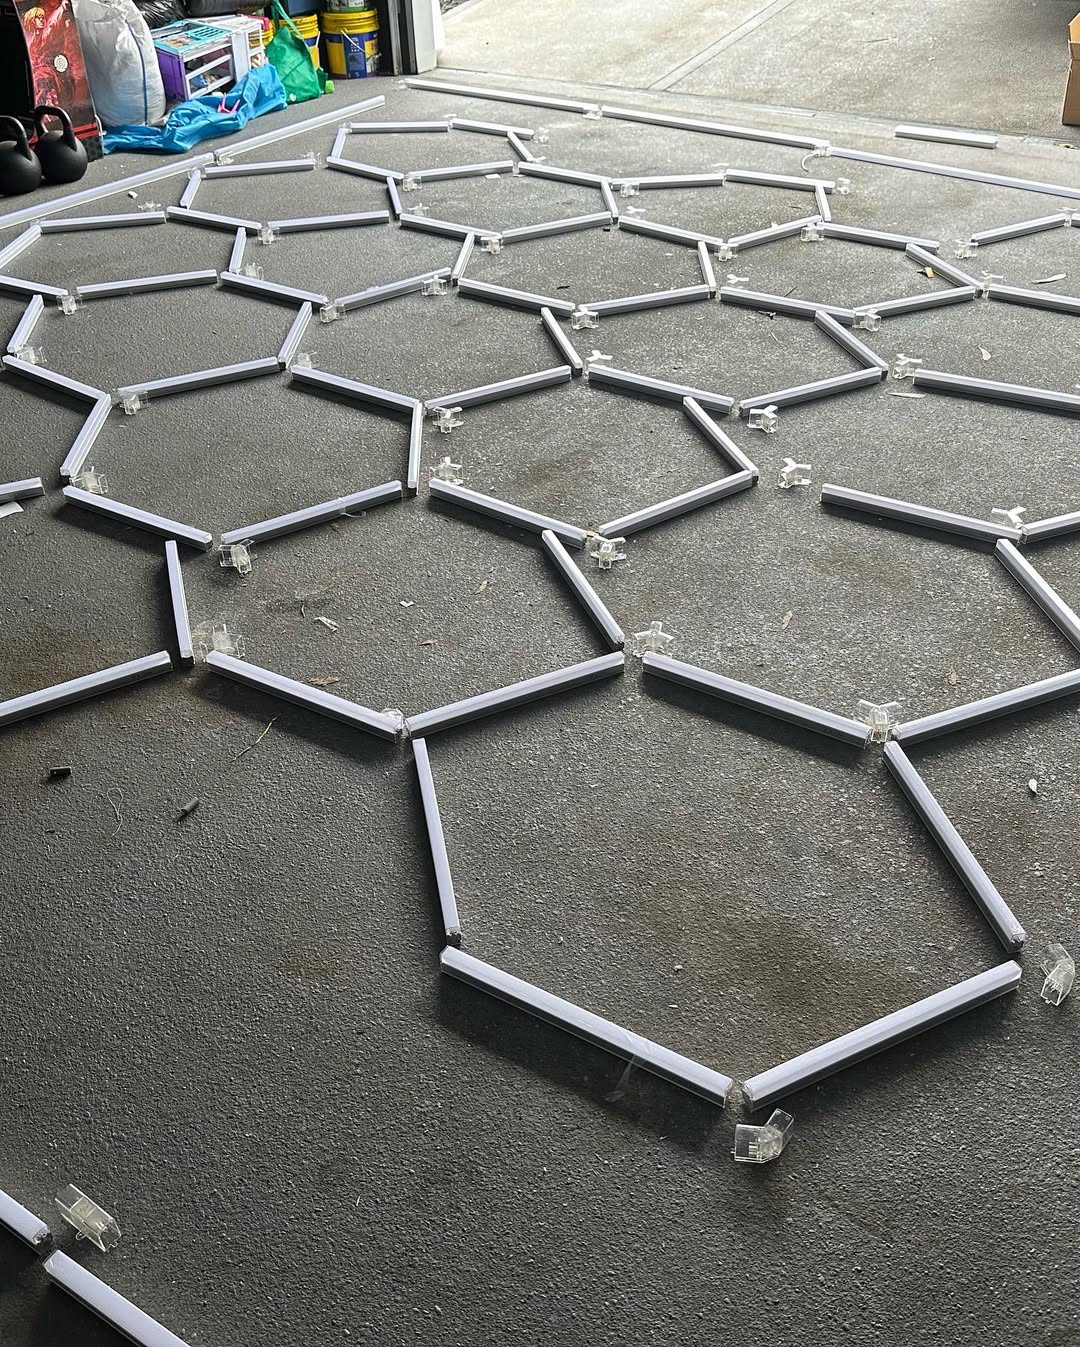
Before drilling any holes, figure out exactly where your hexagon lights will go on the ceiling.
Lay your hexagon lights on the floor first to visualize the final pattern and confirm the layout fits your space. Then use a tape measure and laser level (or spirit level) to mark the mounting positions on your ceiling. Painter's tape or chalk works well for temporary marks.
Take a step back and check the overall alignment before committing to any holes. A few extra minutes of planning here saves a lot of rework later.
Need help figuring out how many lights you need? Check our hexagon light layout guide for sizing recommendations by room type.
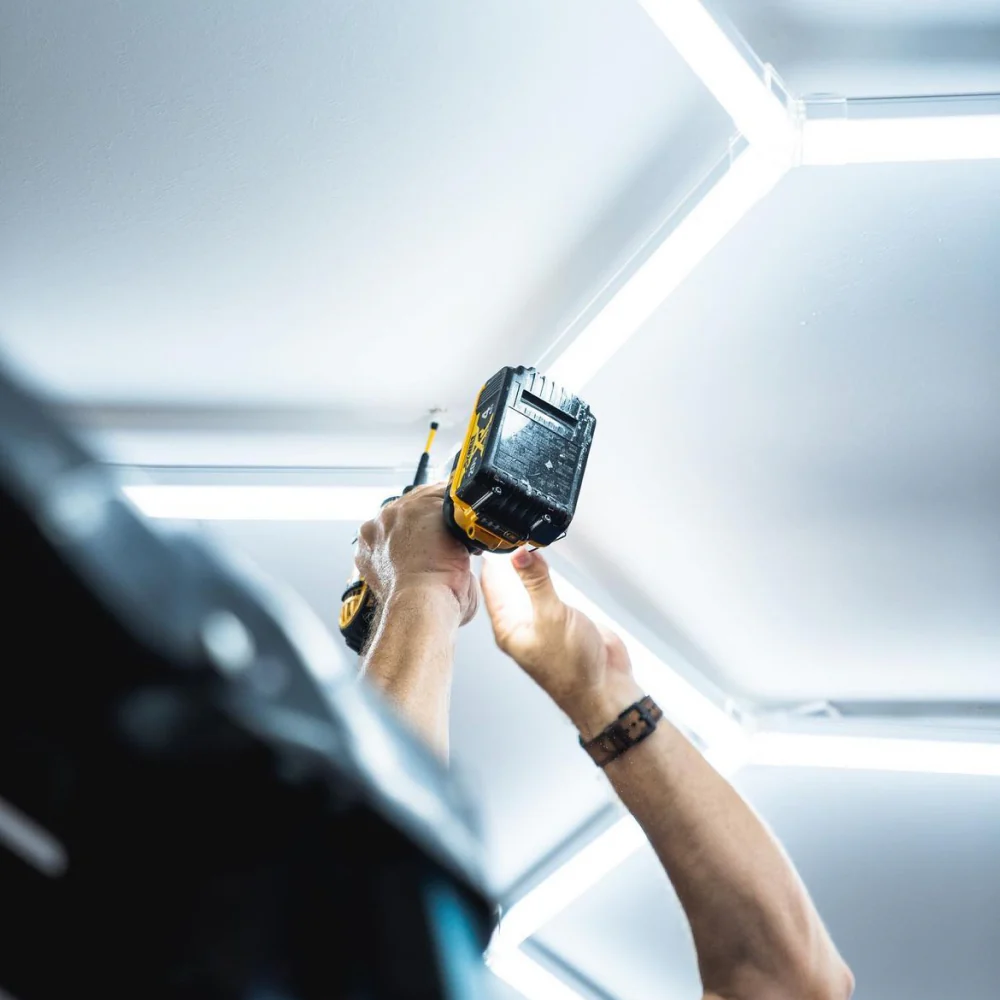
Follow the instruction manual included in your kit to assemble the hexagon light structure. Start with a single full hexagon using the straight tubes and connectors provided.
Do not force any connections. Forcing a tube into a connector can damage the copper contact pins, which may cause that tube to stop working. If a tube does not slide in smoothly, try a different connector from your kit.
Tip: Tilt the tube at a 45-degree angle and insert the diffuser (cover) side first. This makes insertion much easier.
Once a full hexagon is assembled, add additional hexagons outward in columns or rows. Keep the pattern symmetrical as you build.
If your kit includes a border, assemble it separately first for structural guidance.
Important: Perform a quick power test on the ground before mounting. Connect to power, verify all tubes light up, then disconnect before climbing the ladder.
Once your hexagon light structure is assembled and tested, it is time to mount it to the ceiling.
Use the screws and mounting hardware included in your kit. Mark your mounting positions on the ceiling, then secure the light structure in place.
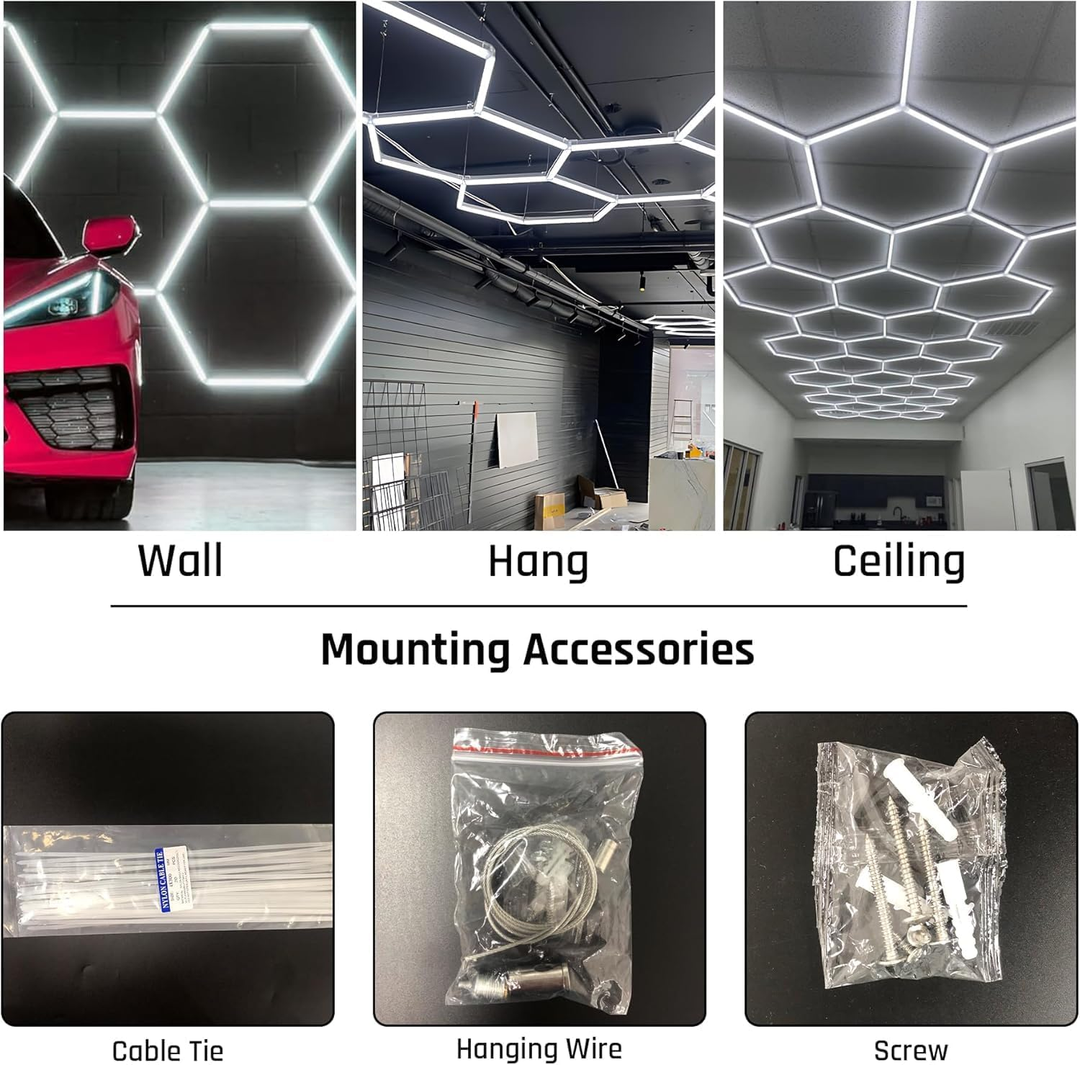
HEXLED supports three mounting methods:
Always have a second person help with large assemblies. Do not overtighten fasteners.
For plug-in systems: Route the power cord along the ceiling edge or through cable channels for a clean look. Connect the 3-pin plug to a standard wall outlet and power on.
For hardwired systems: Hire a licensed electrician to wire the lights directly into your room's electrical circuit. This gives you a clean, permanent setup that you can control with a wall switch.
With everything mounted and connected:
Final touches:
Don't have your hexagon lights yet? Browse our hexagon lighting collections to find the right set for your space before starting your installation.

Verified Review
“The best lighting upgrade I’ve made to my garage!”
"Installation was super easy. The brightness is insane - feels like a premium showroom now."
- Rocco ★★★★★
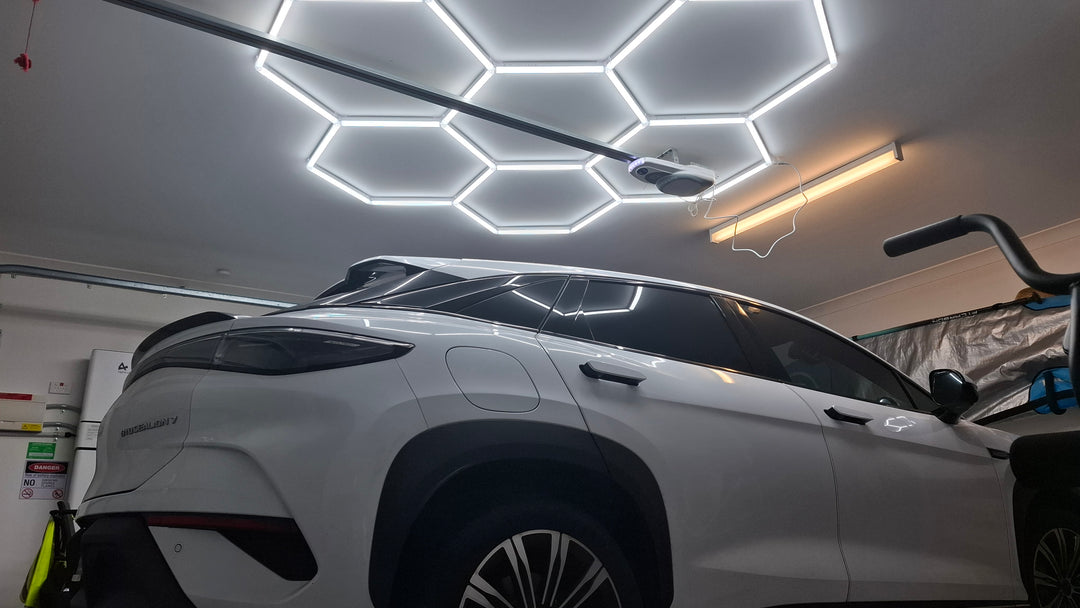
Garage installation tips:
Home gym installation tips:
Workshop and barber shop tips:
For garage-specific options, see our hexagon garage lighting collection. Setting up a gym? Browse our gym lighting collection.
Most DIY installations take 2 to 4 hours for a 4 to 6 light system. Smaller setups (1 to 3 lights) can be done in about an hour. Larger systems or hardwired setups may take longer, especially if an electrician is involved.
Insert the tube at a 45-degree angle with the cover (diffuser) facing downward. This aligns the contacts correctly and makes insertion much easier. Never force a connection. Remove the protective film before assembly.
No. HEXLED hexagon lights are only 1.5" (38mm) thick and sit flush against the ceiling. They fit between standard garage door tracks without interfering with door operation.
For plug-in installations, no. You can handle it yourself with basic tools. For hardwired installations, yes, we recommend a licensed electrician to ensure safety and code compliance.
Yes, with proper mounting brackets and anchors. The modular design accommodates most angles. For steep slopes, contact our team to discuss the best mounting approach for your specific ceiling.
It depends on your space. 3000K (warm white) suits relaxation and retail spaces. 4000K (neutral) is great for general purpose. 5000K (daylight) and 6500K (cool white) are ideal for garages, gyms, and precision work areas. Color temperature is fixed at purchase, so choose based on your primary use case.
Send us your room dimensions and we will create a free layout recommendation. You can also use our layout planning guide to estimate based on room size and brightness needs.
Ready to Get Started?
You now have everything you need to install hexagon LED lights like a pro.
If you are going with a hardwired setup, make sure to hire a licensed electrician for the wiring step.
Browse our hexagon lighting collections to find the right fit for your space.
Need a custom layout? Request a free design.
WHAT OUR CUSTOMERS ARE SAYING
“HOLY WOW - THESE LIGHTS ARE BRIGHT!”
"Spent a Sunday morning setting these up, and wow - the difference is insane. Bright, clean light and no shadows anywhere."
- Damian R. ★★★★★